Part 1: Create Your Account and Sign In
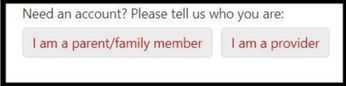
2. Click "I am a parent/family member"
a. The image below shows what your screen should look like
a. The image below shows what your screen should look like
3. You should see a screen with 2 videos and an area asking for you to fill out the following information:
First and Last name
Email and Password
4. Your account will be automatically created, and you will be directed back to the login screen.
First and Last name
Email and Password
4. Your account will be automatically created, and you will be directed back to the login screen.
5. Click “Sign-in”
a. Click “remember me” if you want your login information saved for the future.
a. Click “remember me” if you want your login information saved for the future.
6. When you first login, you should see a page that looks like this
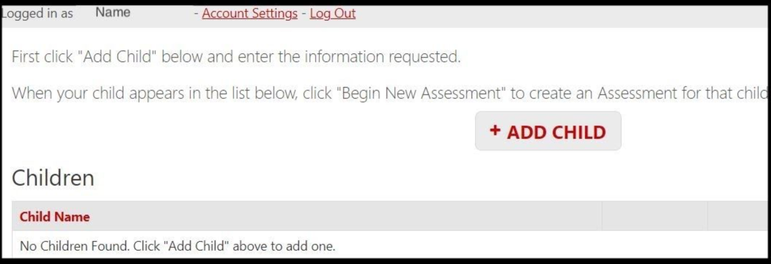
7. Follow the instructions on each page to proceed through registering each child for the assessment.
|
a. Please note that on each screen there are both ASL and written English instructions. Please use your preferred language. When you begin the vocabulary checklist, you will be asked to watch the ASL videos of each sign.
|
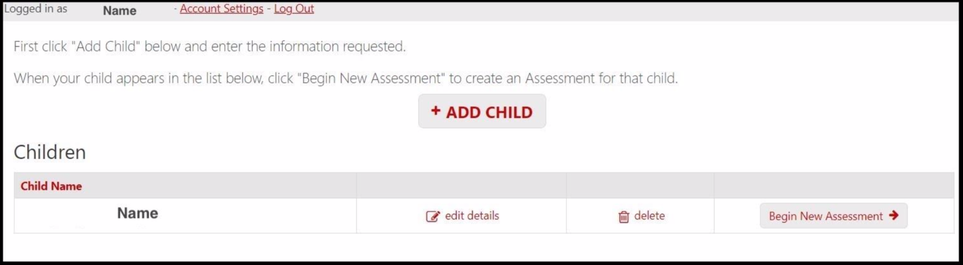
8. After you finish entering the requested information, you will be taken to a page that looks like the image below, where you can either add another child if needed or “Begin the new Assessment”
Part 2: Answer Preliminary Questions
1. Click “Begin New Assessment”
2. You will be directed to a screen with a video of instructions in ASL. Below the video, there are written English instructions where you will select which assessment you wish to take.
|
a. Depending on your needs, choose either the “Long Form” or “Short Form” assessment. Your screen should appear similar to the image below.
|
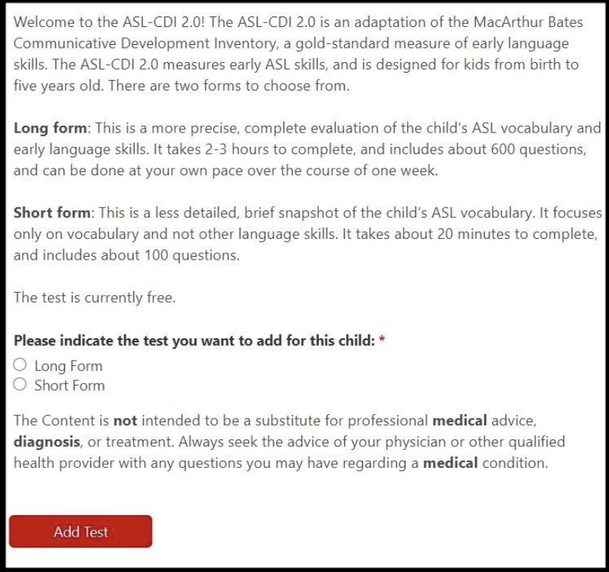
|
b. After you have chosen the test you will complete, you will be asked to review/sign the Consent Agreement and complete an additional questionnaire before you may begin.
c. Please read over the consent form, agree to the statement of consent, and provide an electronic signature. You can optionally agree to allow your data to be used for research purposes and/or to be contacted in the future. You are not required to agree with these in order to continue with the assessment. After this page, you will be asked to answer a background questionnaire for your child. |
3. After signing the form, click “Next”
4. You should now be on the page where you will be asked to complete a ‘Background questionnaire,” that is a few pages long.
5. While filling out the questionnaire put “N/A” for any information you do not know and “0” for any numeric information you are unsure of.
4. You should now be on the page where you will be asked to complete a ‘Background questionnaire,” that is a few pages long.
5. While filling out the questionnaire put “N/A” for any information you do not know and “0” for any numeric information you are unsure of.
Part 3: Begin and Complete Assessment
1. After completing the questionnaire, a page will appear with instructions about the assessment, please read all of the instructions before dismissing the page.
2. You will then be taken to a page where you will start the assessment.
2. You will then be taken to a page where you will start the assessment.
|
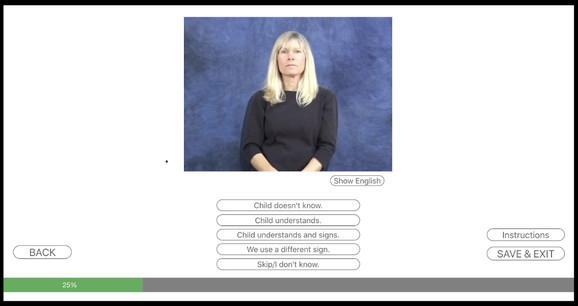
a. Below is an image of what your screen should look like
|
|
b. You can click “Instructions” at any time during the test and the instructions will reappear.
c. You can click “Show English” and the word being shown in ASL will appear in its English written form. d. A progress bar at the bottom of the screen will tell you how far you are in the assessment. e. Remember you can stop at any time by clicking “SAVE & EXIT” to continue later. When you return to take the test, you will be able to click “Continue.” |
3. When you complete the test, click “Home”
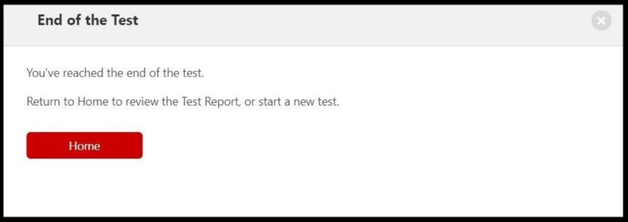
4. You will be directed back to the 1st page where you will see your child’s name appear, along with the progress of the assessments.
Part 4: Continuing and Editing an Assessment
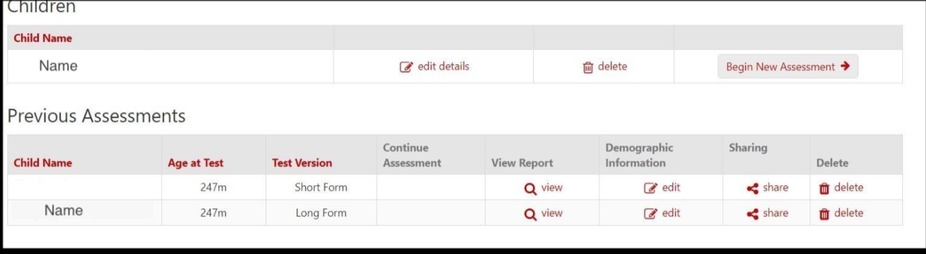
1. You can edit your demographics information by clicking “edit” which is under the “demographic information” column (please refer to the image above to see what your screen should look like).
2. After you complete the edits, click “submit” which is at the bottom of the page and you will be directed back to the home screen.
3. To share or unshare with a provider
2. After you complete the edits, click “submit” which is at the bottom of the page and you will be directed back to the home screen.
3. To share or unshare with a provider
|
a. Click “share” which is under the “sharing” column as it shows on the image above.
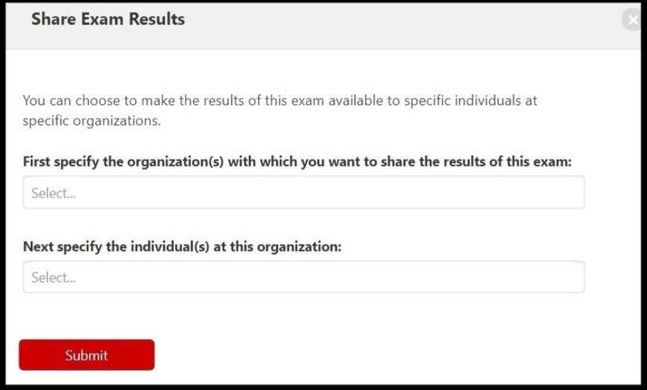
b. You can choose to make the results of this exam available to specific individuals at specific organizations. c. Your page should look like the image below, click "submit" when you are done, this will save the information you entered and direct you back to the home page. |
Part 5: Results
1. Once you complete the test, you may review the Test Report.
2. Your report includes your responses and the scores of your child. The information provided is an evaluation of your child's ASL vocabulary.
2. Your report includes your responses and the scores of your child. The information provided is an evaluation of your child's ASL vocabulary.

3. You can now log out by clicking “log out” on the top left corner of your screen and close the window.